
13 April 2023|Kenyan Recipes
Chapati comprises 3 main ingredients: flour, water, and oil. The English name for chapati is; flatbread. Chapatis are originally from India and were introduced to Africa by Indian immigrants.
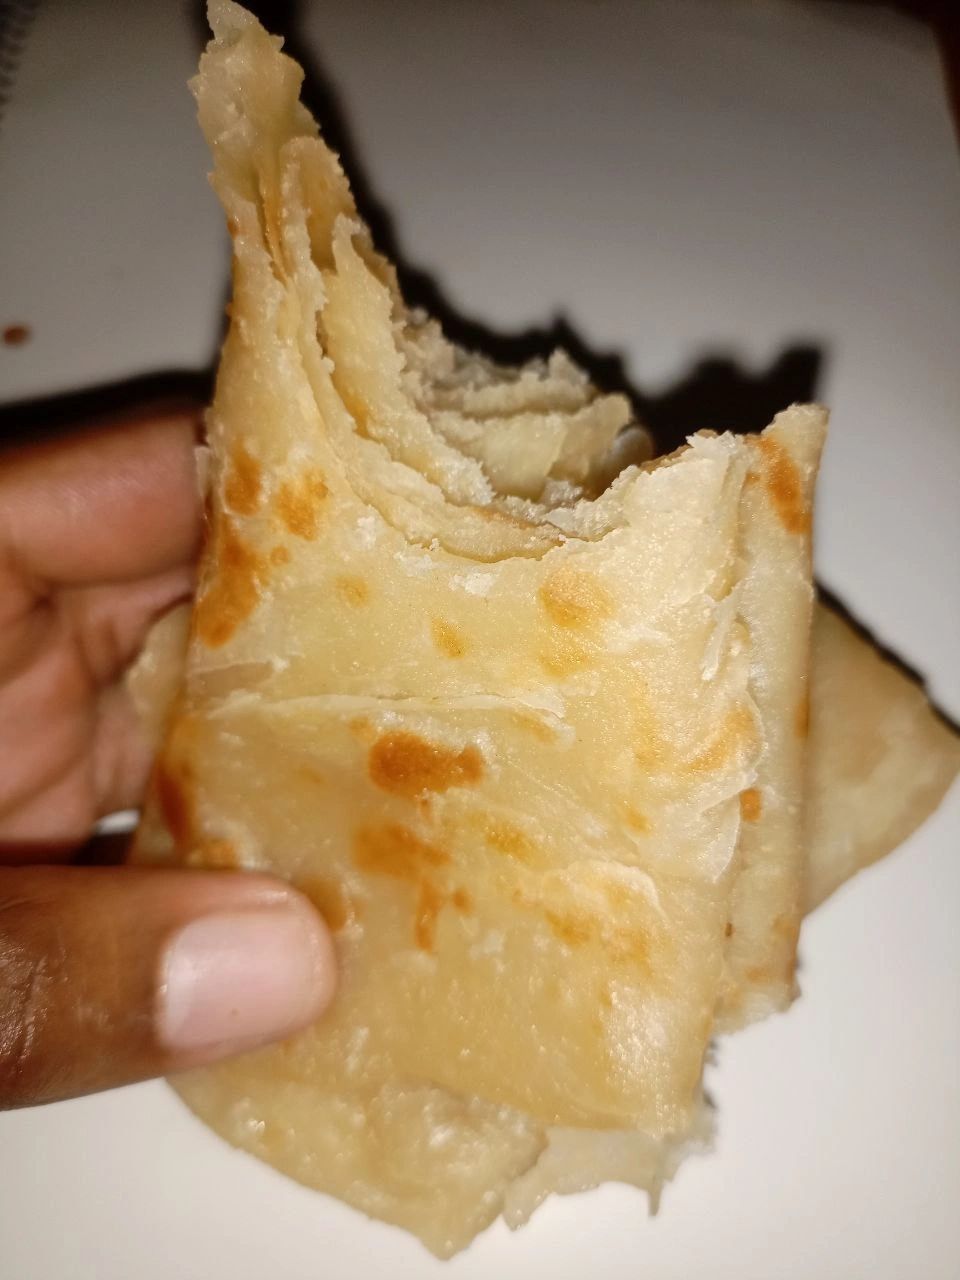
Ingredients are combined and kneaded till soft, rolled out to circles, and pan-toasted(with oil). The resulting chapatis are aromatic, tasty, and filling.
Also, a good accompaniment for stews and curries or even breakfast bread. To add on, they are used in making a variety of wraps, including rolex and smocha.
Chapatis are easy yet hard to make; simple ingredients and few steps are involved in their creation.
If you have skill issues, don’t worry, as this post will elevate and ascend you as it is comprehensive.
It is idiot friendly and might have important tips and techniques for experienced cooks.
Also Read: Mandazi For Beginners Recipe: No Milk, No Eggs

Ingredients
- 2 Cups All Purpose Flour
- 1 Cup Water-Hot
- 2 Tbs Vegetable Oil, 1/2 Cup More
- 2 Tsp Sugar
- A Pinch of Salt
- 1/4 Cup Extra Flour for Dusting
Utensils/Tools
- 1 Large Bowl
- Measuring Cup,
- Rolling Pin
- Flat iron skillet or stainless steel pan
- Whisk or fork
- Silicone brush
- Spatula
Procedure
- Sieve flour for a consistent and softer texture also helps remove large impurities that may be present in your flour. This step significantly affects the quality of your chapatis, especially in the fluffiness factor.
- Mix the dry ingredients together using flour, salt, and sugar. Salt is for taste, and sugar is used to balance out the salt. Sugar is optional, and you can leave it out. Add vegetable oil or ghee and combine. We mix dry ingredients before liquids to ensure they are evenly distributed and prevent clumping.
- Add water a little at a time while stirring instead of the whole amount once. This will help you have reasonable control of consistency and uniform hydration and prevent dough stickiness. Strictly use warm water; you can also use milk, but make sure it is hot. Milk will add more flavor and richness to your chapatis.
- Use your hand to knead till the dough is no longer sticky. Kneading is key. This takes around 7 to 10 minutes. You can use a food processor too.
- Cover in cling film or a damp towel and let it sit for 20 minutes
- Punch the dough, and knead again (as the dough softens after resting). Cut the dough into 4 portions, flour the surface, and roll out the individual doughs into circles
- Oil the top surface of the circles with a silicone brush and fold the circle back to form a strip
- Using your finger, roll the strip around it to form a circle and knot the end to the inside of the circle(where your index finger is)
- Let it sit and cover for 15 minutes to allow layers to form and further rest the gluten.
- Dust the working surface again, and roll out individual doughs to a circular shape.
- Pre-heat pan till hot
- Add your rolled chapati and heat till bubbles form and the upper side turns translucent.
- Flip and cook the other side
- Oil the cooked side and cook again till slightly charred with brown spots
- Repeat


Tips & Notes
Use hot water Cold water will harden your dough, and hot water will make chapatis soft; we want them flaky and soft.
Hot water inhibits gluten formation by denaturing the proteins. This makes the dough elastic and smooth, resulting in ease of working it.
In addition, hot water has good solubility for added solids like sugar and salt. In recipes that use yeast, only use warm water as hot water will denature the yeast.
Choose good quality flour Consult to find a reputable brand in your location. For flour types, you can go with All Purpose Flour, Chapati Flour, or Atta Mark.
You can opt to blend flour with Atta Mark. Atta Mark is made from whole wheat, while All Purpose Flour is highly processed.
Atta Mark is the healthier choice, and its dough turns out more elastic due to higher gluten content. It is easier to work i.e. knead and roll.
Freshly milled wheat flour offers the softest chapatis if you can get your hands on it.
Cover dough Prevents moisture loss, making the dough soft all through while resting. We rest the dough to relax the gluten, allowing us to have ease kneading and rolling ahead
Kneading Oil while kneading to keep the dough soft and moist. Also, don’t over-kneed as this will result in tough chapatis.
You can use a food processor to make work easier tho you have better control by hand kneading. However, a food processor improves efficiency and time consumed, but there is a risk of overworking the dough.
This won’t be a problem hand kneading as you can feel the resistance and texture while on it.
Dusting: Always dust your working surface to prevent sticking. However, don’t over dust as your chapatis will be hard.
Dusting also helps with providing grip while rolling to make the perfect circles if so desired.
Rolling evenly for even cooking, doesn’t have to be a perfect circle but should have consistent thickness.
If you want perfect circles and easy rolling of chapatis, then ensure you alternate and roll opposite sides.
Mold your dough into a ball then flatten it with your palm before rolling (for evenness). Note that you should roll the ends first before evening the rest of the chapati. Making perfect circles takes a lot of practice.
Oil: You can either go with vegetable oil, sunflower oil, or ghee (clarified butter) to cook your chapatis. (Any oil with a high smoking point is ideal.)
If you can get ghee, it is the better and healthier option. However, it is higher in calories if you are watching your intake.
Ghee will add more flavor and help retain the chapatis’ softness even after hours.
Cooking Higher will burn lower and harden; just use medium heat. Flip the chapati once bubbles start forming on the upper side.
Don’t keep flipping the chapatis over and over just let one side cook to completion until brown spots form.
Stack your chapatis together and cover them with a cloth after cooking, this helps in retaining moisture and ensuring freshness.
Practice & Patience: Chapati making is skill-based, so it takes multiple tries before getting it right.
You shouldn’t skip any step, even if it feels unnecessary.
My first perfect chapati were from following all the instructions to the latter.
Don’t use baking powder: Chapatis don’t require a leavening agent, they are not supposed to rise, which is why we call them flatbread.
Adding baking powder will alter the texture, and your chapatis will break off.
Serving Suggestions
Wondering what to eat with chapati? Well, no utensils are required. Chapatis are hand-eaten the favorite pairings go great with chapati;
- Curries: Spicy Potato Curry, Chicken Curry,
- Stews: Lentils, Beans, Beef, Mutton, Green Grams
- Butter Chicken
- Glazed Pork
- Tea or Coffee

Differences Between Chapati, Roti, and Naan
The differences are either from the used ingredients or cooking methods. Chapati and Roti are unleavened (They don’t use yeast, so they don’t rise).
Meanwhile, naan calls for yeast use and yogurt. Naan has a smoky flavor from the charring and is brushed off with garlic or butter after cooking.
Chapati and Roti are generally thin, while Naan is thick and fluffy due to the leavening. In short, chapati and roti are essentially the same thing.
- Naan is cooked in the oven whilst chapati and roti are cooked in the pan
- Naan is doughy, while chapati and rotis are more on the crisp side
Related Links
Chapati With Beans Recipe: The Default Campus Cuisine